An-ti-ci-pay-ya-tion: Preparing to Section-Hike the A.T. Through Shenandoah National Park
I spent eight days backpacking through Shenandoah National Park on the Appalachian Trail. Click here for my Trip Summary to find articles, maps, and details around trip prep, packing, and lessons learned.
The Appalachian Trail, aka the AT. Every time I hear that name I have to pause. The AT is known as the granddaddy of long-distance hikes, stretching almost 2,200 miles from Springer Mountain in Georgia to Maine’s Mount Katahdin. That’s reeeeally long. To put it in perspective, Lynn and I hiked the 100-mile segment that runs though Shenandoah National Park and if we put in the same mileage each summer, it’d take us 22 years to complete the entire trail. 22 years!
Much like a Thanksgiving feast, the time Lynn and I spent planning and prepping for this hike far outstripped the hike itself. It didn’t have to of course, but this was Lynn’s first backpacking experience and the first time I backpacked without Chris, my usual wing-man. We’re also pretty risk-averse and like to know what to expect. I think this quote pretty much sums us up (Lynn shared it with me a full five months before our projected start date): “The plan is nothing, planning is everything.” Yup. We planned the heck out of this trip. Especially Lynn - she's a dynamo!
It’d be overwhelming (and overkill) to share all of our preparation, but I’ll cover the biggies, starting with the long game (training hikes, learning knots) and ending with backcountry permits. Packing will get its own article!
Take Training Hikes
Hiking with fully loaded packs is probably the A-#1 most important thing we did to prep for our multi-day backpacking trip. Why? A bunch of reasons, but mainly to: 1) get in sport-specific shape; and 2) shake down equipment.
We hiked in late August but committed way back in February to try for 15 miles a day on the trail - ambitious! Since I’d had a number of minor over-use injuries in recent years, I was overly cautious with training and pledged to hike every week with a 25-pound pack, starting at 5 miles in June, increasing about a mile a week, and ending with a 14-miler the week before the big trip. I’m not gonna lie, it got harder and harder to fit those training hikes in the longer they got, but the longest ones taught me the most, especially about what to bring along, how to organize my pack, and how to deal with sore feet. They were well worth the time invested.
Since Lynn lives in Virginia and has the Shenandoah National Park (SNP) right in her back yard, she used training hikes to check out potential camp sites and water sources. It was awesome to have a man on the inside. As a newbie to backpacking, she also practiced pitching her new tent (a breeze), figuring out how to organize her pack (harder), and experimenting with trail food (quickly realizing why I'm willing to carry a stove; mmm...hot food).
Coordinate Online
Lynn lives in Virginia and I was alternately in Oregon and then New York, so we kept each other up to date using a few online tools. We started out with email, but quickly realized that long email threads can get unwieldy. We switched to Google Sheets (for backpacking checklists, hiking tables, etc.) and Slack (an online management tool). I’d never used Slack before, but it proved to be a handy repository for images, resources, website links, and discussions.
Practice Knots
Most knots aren’t hard-coded in my brain so I needed a refresher to be able to string a clothesline or hang a bear bag. I kept a length of rope out and practiced a few knots each day including a bowline, slip knot, clove hitch, and double half hitch. When working knots, it helps to use a pole or tree (as you’d really tie them), not just tie in mid-air.
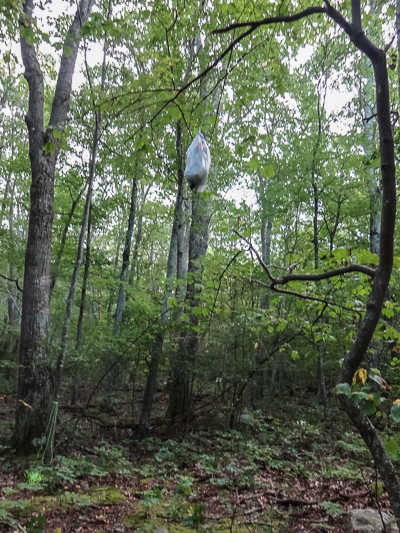
The SNP is black bear country and Lynn favored this guy’s method for hanging a bear bag. He shows a quick way to tie a clove hitch around a small stick in the middle of a long rope - pretty cool. Bear poles and bear boxes are provided at established camp sites throughout the park, so we only had to hang from a tree once. We tried the stick method but weren’t happy with bag height and proximity to a neighboring branch, so ultimately tied off to another tree using a standard clove hitch.
Test Equipment
In my book, the middle of the woods is no place to figure out equipment. On our seventh night we ran into a couple on their first night who had never used their stove and couldn't get it to light. Another hiker helped them out, but if he hadn't been there...cold dinner, cold breakfast, no coffee in the morning. Not game-ending, but a bummer.
I hadn’t backpacked in almost a year, so over the summer I fired up my JetBoil stove and stepped through the 2-stage water treatment process using AquaMira chlorine dioxide drops. I was using my backpack weekly (still solid after 10 years, knock on wood) and Lynn used our tent a few times. I never did blow up my Exped sleeping pad (silly!) but had a repair kit along if needed.
Of course the best way to test equipment would have been to go on at least one overnight hike, but since we’d share Lynn’s tent, I didn’t bother to haul mine out to New York. Instead, I tested what I could and relied on detailed checklists from previous backpacking trips.
Test-Run Technology
Backpacking sure isn’t what it used to be! We didn’t have to bring our fancy smart phones along, but they make life easier and provide a measure of security. I also threw in my Kindle and a digital voice recorder. A few notes on each:
- Download iPhone map app: Lynn recommended the PATC Shenandoah app, so I downloaded and played around with it. Though the AT is very well marked, we used the app a couple times when cutting through campgrounds. It uses GPS to show your current location as a blue dot, making it a no-brainer to navigate back to the trail.
- Test iPhone battery life: Though I desperately wanted to use RunKeeper on the hike, it was too much of a battery hog. I researched ways to extend battery life and ultimately decided to essentially turn my phone into a camera, with the other capabilities as back-up. After a series of settings changes (which I’ll document in another article), I only experienced 5–6% battery drain per day. Excellent!
- Practice with digital voice recorder: My mind is a sieve; if I want to remember details, notes are imperative. Writing while walking is difficult (!) so I purchased the Sony ICD PX333 and practiced using it on training hikes and transcribing notes after. It was easy and reliable though I had one scare after dropping it on concrete. I also tested the battery life by leaving it active for hours on end; there was little drain, so no need for spare batteries for an 8-day trip.
- Load books and charge Kindle: This is a quickie, but a Kindle is no good without books or battery. To save battery life, I switched it to airplane mode.
Prepare for Bears and Ticks
According to the dulcimer-player at Skyland (reputable source?), the SNP has the largest concentration of black bears in the United States. Lynn had a couple sightings on training hikes and had no desire for a mama/baby bear encounter. We both read up on how to deal with bears, and decided the best defense is a good offense: We were VERY loud. It worked. Where others saw six bears on one piece of trail, we saw none.
I don’t normally hike in tick country, but for this trip I purchased Permethrin and treated my hiking clothes, hat, backpack, and sit pad.
Develop a Hiking/Camping Plan
First things first: southbound or northbound? Lynn suggested we hike from north to south since there are numerous campgrounds, stores and picnic areas in the north and central sections of the park, providing a safety net while figuring things out. It was a good call. We ran across ill-prepared folks in the south who faced long miles of hiking to the next water and shelter.
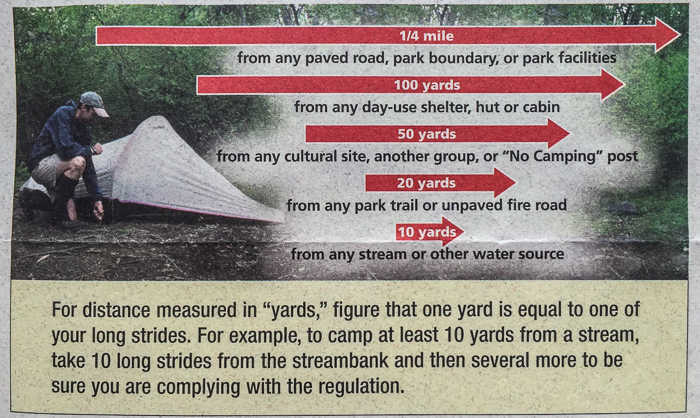
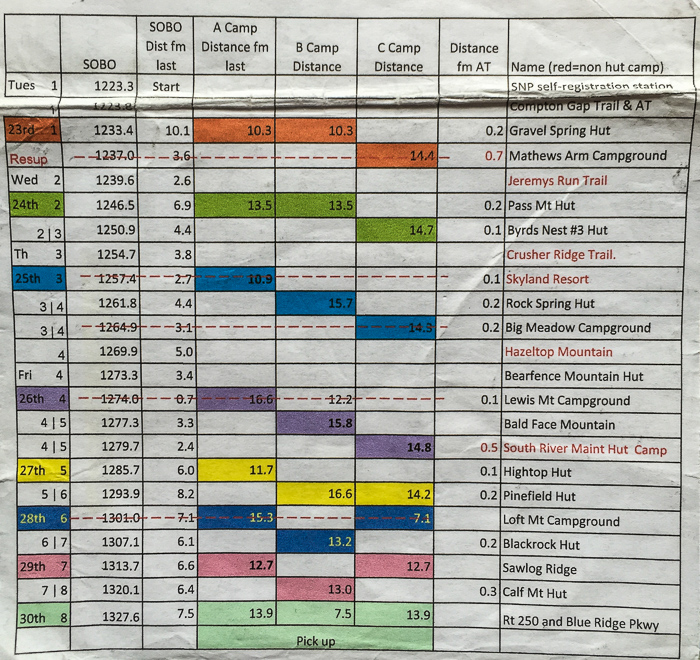
From the beginning, Lynn was uber-focused on potential campsites. Given the terrain and myriad rules for backcountry camping, I can’t blame her. It’s tough to find a nice, flat, completely “legal” site outside of designated camping areas. Lynn developed three different hiking plans, summarized on the table below (impressive!). Each day we’d decide how far to go based on how well the bodies and feet were holding up. For additional reference, here’s an 8-day guide from the SNP (averaging 15 miles per day), and a 7-day guide (averaging 17 miles per day).
In the end, we mostly followed Lynn’s “C” plan averaging 14 miles per day and camping at Matthew’s Arm (paid $15 for tent site), Byrd’s Nest #3 Hut, Big Meadows (paid $20 for tent site), South River Maintenance Hut (actually just beyond the hut; no camping allowed right there), Pinefield Hut, Blackrock Hut, and Calf Mountain Shelter. The huts are free and their campsites are first-come first-served. Calf Mountain is technically a “shelter” since it lies just outside SNP park boundaries.
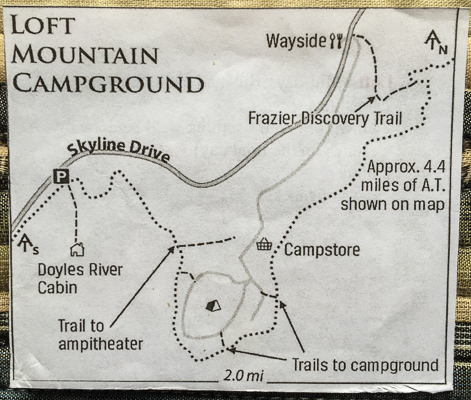
Before setting out, Lynn copied maps of Matthew’s Arm, Elkwallow, Skyland, Big Meadows, and Loft Mountain campgrounds. Though near the AT, campgrounds are large and we had no interest in adding extra mileage by wandering aimlessly trying to find the camp store or tent sites. Even armed with rough maps, we asked for directions more than once.
Determine Water and Resupply Points
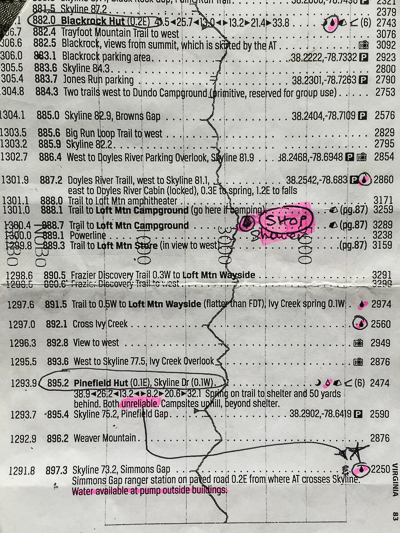
To find water sources, I relied on my copy of The A.T. Guide and cross-checked against the SNP’s “Water Sources and Conditions” page.
Before the trip, I copied relevant pages from The AT Guide, highlighted water sources, and made notes about where to fill up if later sources were questionable. When hiking, we always asked others about upcoming water and huts, but some days we had no advanced intel and had to rely on our pre-trip notes.
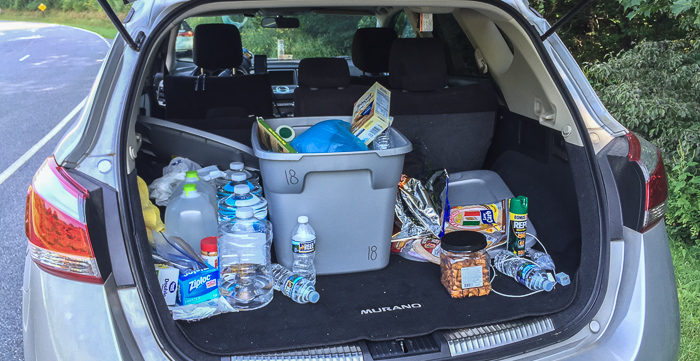
Given the camp stores and waysides at Elkwallow, Big Meadows, Lewis Mountain, and Loft Mountain, resupply shouldn’t be an issue for hikers. Still, we found that most long distance backpackers got rides and resupplied in nearby towns, probably to save money. To start, we carried food for about four days (though planned to purchase one lunch and snacks from waysides), and made arrangements for Steve (Lynn’s husband) to meet us on the morning of Day 5 at an intersection of the AT and Skyline Drive. We’d purchased so much food in advance, it only made sense to resupply ourselves rather than purchase from camp stores along the way. Buuuuut we were still looked forward to each “civilized” stop; junk food from camp stores was a huge treat! Let’s see, I’ll take some Pringles, a Moon Pie, those chocolate-covered ice cream bites,…
Arrange for Transportation to and from the Trail
Again, I felt pampered due to local connections. Steve dropped us off at the Chester Gap trailhead, met us for re-supply, and then picked us up at Rockfish Gap at the end. For those without friends/family in the area, the Appalachian Trail Conservancy looks to be a comprehensive resource for trailhead access, AT shuttles, and bus, plane and train information. From chatting with other hikers, we learned that many area hostels will provide rides to and from the trail.
Complete a Backcountry Permit
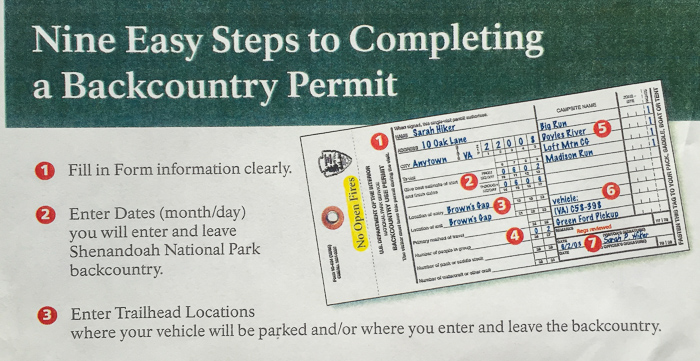
The SNP requires that hikers complete and submit a backcountry permit (one permit for up to 10 people in one party). You can pick up a permit in person or request it in advance. One copy of the completed permit must be attached to your backpack and the others turned in by mail or at a self-registration station in the park.
I requested a permit by mail and received it just a few days later. It went unused, however, since Lynn completed one for the two of us and dropped it off a couple days prior to our start date. Refer to the SNP website for complete backcountry permit information.
Ok, that’s enough for one article! I haven’t addressed food and gear, but they’re important enough to warrant their own post.
So at the end of the day, was all this planning necessary? Some yes, some no. It would be foolhardy to head into the woods without adequate food, water and gear, but much of our planning went above and beyond and really served to increase confidence and decrease potential discomfort. It worked in spades. The hike went swimmingly with no major hiccups; plenty of duct tape on the feet, but no major hiccups!
I'm embarrassed to have this one in big bold print...
...so I put it at the very end it might get overlooked. I had one more To-Do on my pre-trip my checklist. No, it wasn't "Practice going in the woods" (you know, going in the woods, discreetly and efficiently). That's certainly an issue and one that I've addressed through methodical experimentation, but no worries, I will spare you the details on that delicate subject.
Instead, cue "You're So Vain" for my final checklist item: "Dye eyelashes." What can I say...I detest how tired and wan I look without eye makeup, but there's no way I was going to carry mascara and eye makeup remover. Dyeing takes about 15 minutes and while it doesn't look as rich as mascara, it's good enough. Having chemicals near my eyes is unnerving, but I take my time and am exceedingly careful.

