Climbing Yosemite’s Half Dome: 6 Crucial Tips for a Successful Trip
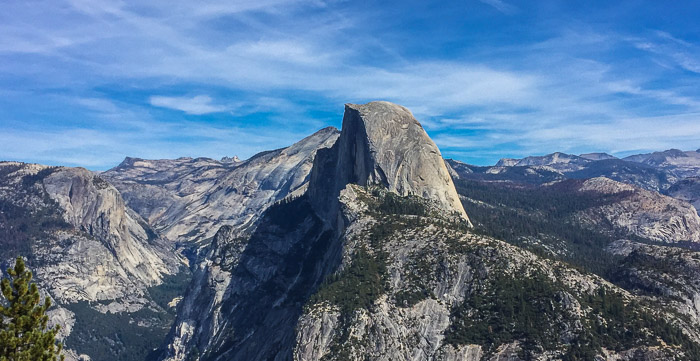
It’s hard to resist the call of Half Dome, one of Yosemite’s most prominent and awe-inspiring features. The image of that massive edifice drills deeper with each viewing, capturing the imagination and fueling adventurous fires within. What’s that you say? You can climb Half Dome? And there are cables to hold onto all the way up? It looks so easy! A walk in the park! Let’s do it!!
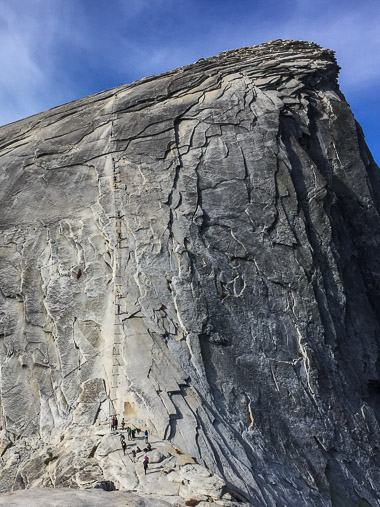
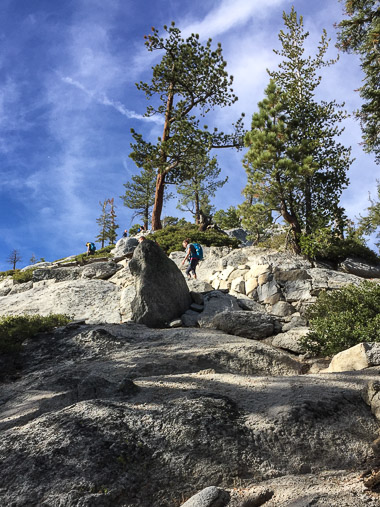
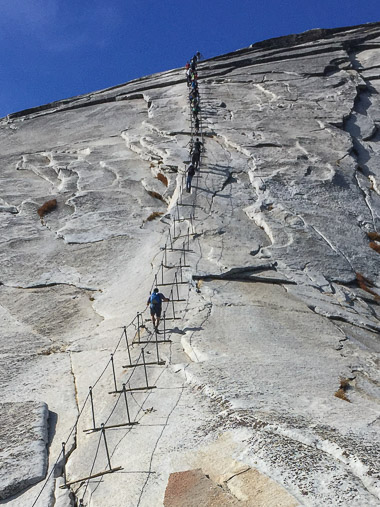
Judging from the 45-minute wilderness talk delivered by an upbeat but obviously exasperated park ranger, folks regularly march into Yosemite’s woods both over-confident and under-prepared. On our Half Dome trek, we passed dozens of people wilting on the trail before the steep sub-dome climb that’s before the final cable-climb. And on the cable portion, one terrified person shared “This is the worst thing I’ve ever done in my life” and another just whimpered as I passed. No exaggeration - she clutched the cables in a vice-like death grip, and whimpered. Of course I also saw a couple of 12-year old boys scamper past and brag to their scout leader that they’d climbed the whole way outside of the cables (not recommended!!).
A staggering spectrum sets out to climb Half Dome each day, ranging from the highly informed and prepared, to the dumbfounded and exhausted (some of whom seem to have been dragged along by well-meaning but misguided friends). No matter your fitness or experience level, a hike in the backwoods should never be taken lightly. This hike is truly one of the most dangerous in the park with sections that are near vertical on slippery, polished granite. It’s also long: a 7-mile round trip at the shortest if overnight camping at Little Yosemite Valley campground, or over 14 miles total if day-hiking up the Mist Trail.
If you have dreams of conquering Half Dome, take some time to research, plan, and prepare for a successful trek. Your diligence will pay off! Prepared hikers will likely be exhausted at the end of the day (in a good way), but will have enjoyed a thrilling hike and stunning views of waterfalls, forest, and valley. Unprepared hikers can at best hope for Type 2 fun: an experience that’s miserable at the time, but better in hindsight once the pain and discomfort fades.
There are dozens of websites and articles offering top-quality tips for hiking Half Dome; this one discusses everything from permits to bathroom facilities. With all this information, it’s easy to get lost in the little stuff. Pay close attention to the biggies:
Get a permit
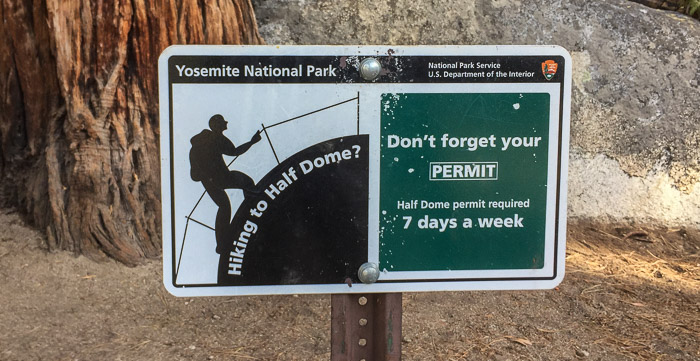
To manage the crowds on Half Dome, permits are required. Hiking without one risks a fine (and possibly jail time), an abrupt end to your trip, and a ranger-escort out of the woods. Plan ahead and obtain either a wilderness permit for the Half Dome area (which is good for up to two weeks of backpacking), or a day permit (issued via a lottery). Cables are open mid-May to mid-October and the pre-season permit lottery runs March 1st through the 31st. Wilderness permit reservations are available 24 weeks in advance.
Note: There are no same day out-and-back permits available in the park. If you just show up and want to climb Half Dome, you must still use the lottery system (by calling or applying online) and the soonest you could get out is 2 days hence. So if you want to hike on a Saturday, apply by Thursday latest.
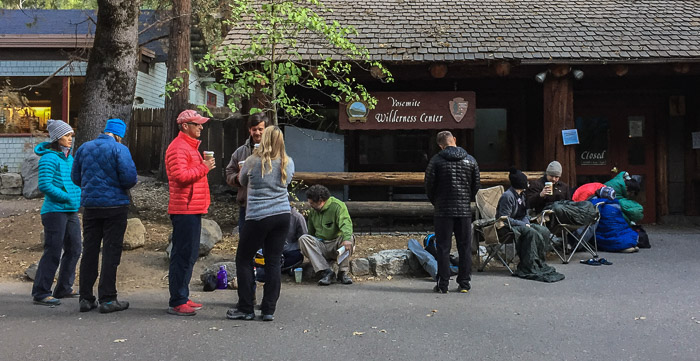
Since the Yosemite Wilderness Center reserves a limited number of wilderness permits for walk-ups, this is the best bet for a last minute I-want-to-leave-tomorrow Half Dome hike, though you have to be willing to spend at least one night in the woods. Karen and I took this route, rolled the dice, and arrived at the Wilderness Center at 7:30am. With 10 people already in line ahead of us, our chances were slim to none to get a permit leaving out of Happy Isles, the closest launching point. We snagged the last two permits for Glacier Point, rented a bear vault for $5, drove to Glacier Point, and hit the Panorama Trail the same day. With added mileage hiking from Glacier Point, we camped that night at Little Yosemite Valley campground and climbed Half Dome the following day.
A few important notes on wilderness permits:
- Don’t try to game the system by day-hiking Half Dome with a wilderness permit (i.e., doing an out-and-back without camping overnight). Rangers patrol the area and if you have a wilderness permit, they expect to see a full backpack complete with overnight gear. Of course you don't have to climb Half Dome with everything - we left most gear at Little Yosemite Valley campground and hiked with day packs from there.
- Only one person is required to wait in line for a group’s first-come first-served wilderness permits. That can work in your favor (letting the rest of your party sleep in) or against you (the permits could disappear, even if you’re near the front of the line).
- Expect to be at the Wilderness Center from at least 8–9am and then return at 11am. A friendly ranger popped out at 8am, but he proceeded to give us a 45-minute lecture about the permit system, leave no trace, how to be a good backwoods steward, and generally how to avoid getting escorted out of the woods. He then took names and permit requests, but most permits weren’t issued until 11am.
- You don’t have to hike Half Dome from Yosemite Valley; some Half Dome wilderness permits launch from Tuolumne. It pays to research and prioritize hiking/camping options. Most folks were scrambling as preferred permits disappeared. Talk to Yosemite rangers (209–372–0826) or the public information office (209–372–0200) for the most accurate information.
Train, acclimate, and hydrate
Honestly assess your fitness level before tackling Half Dome. This is a strenuous hike requiring hiking endurance, strong legs for steep switchbacks on the sub-dome, and strong arms for the cable climb. At the cables, the rock face is near vertical, polished, and slippery. Wood 2x4s provide push-off points every six feet or so, but in between, your arms are doing the heavy work. Take personal responsibility to understand the climb (look at photos, watch videos, read blogs) and train as needed, not only for yourself, but for the climbers below you.
The climb up from the valley covers almost 5,000 feet of elevation gain up to 8,842 feet at the top of Half Dome. At elevation, it’s more difficult to breathe and hiking is harder. If you live below 5,000 feet and you’re not used to altitude, spend a couple days acclimating, and hydrate well the day before and day of.
Take the 10 essentials plus 3 more
Hope for the best but plan for the worst. Whether day-hiking or camping overnight, always carry the 10 essentials:
- Navigation equipment: Map, compass, and/or smart phone.
- Water: On average, about a gallon per person for a full-day Half Dome hike.
- Extra food: You’ll be working hard and will need fuel.
- Extra clothing: Weather can change dramatically throughout a 12+ hour day, and afternoon storms can roll in.
- Light source: Headlamp or flashlight. A must! Many hikers start before dawn and finish after dusk.
- First aid supplies: Bandaids, moleskin, over-the-counter pain meds…
- Knife or multi-tool
- Sun protection: Sunscreen and hat or sunglasses
- Fire supplies: Lighter or waterproof matches
- Emergency shelter: I carry a lightweight thermal blanket
And take 3 extras for Half-Dome:
- Hiking shoes with good traction: Both for the hike up and for the slippery cable-climb. Tennis shoes don’t cut it.
- Gloves: For extra grip on the cables. You may have read that there’s always a pile of gloves at the base of the cables, but don’t count on it.
- Water purification: A water filter, drops, SteriPEN, etc. It’s a long day with no potable water sources past Vernal Fall, and there’s an especially long, hot, dry section through Little Yosemite Valley. On the way up, the last reliable water source is the Merced River in Little Yosemite Valley.
Tuck everything inside your backpack
Batten down the hatches before tackling the cable-portion of the Half Dome hike. With only one set of cables about 3-feet wide, hikers must squeeze past each other as some ascend and others descend. Don’t leave anything in outside unsecured pockets (including water bottles) and put cameras and phones away. You’ll need hands free, and dangling items can be distracting and hazardous. When we climbed, a water bottle suddenly popped out and bounced down the rock face before disappearing over the edge. It was empty, thankfully, but could still hurt someone below. And losing things is no fun - that hiker had one less bottle to refill for the hike back down.
Watch the time
When setting out from Yosemite Valley, the average hiker needs 12 hours from start to finish. If you’re not sure of your group’s hiking pace, be conservative and start at dawn. Also know when the sun rises and sets, and note the time when you pass landmarks along the way (carry a small notebook, digital voice recorder, or enter the data in your smartphone). When you hit Nevada Fall, for example, you’re not even halfway to the top of Half Dome. If it took you 4 hours to get there, you’re looking at a 16+ hour day.
You can certainly pick up the pace and hike quickly at certain points on the trail, but all hikers need patience at the cables. They are crowded, single- file, and move slowly.
Don’t get stuck descending at night without a light source - it happens all too often! While camping at Little Yosemite Valley campground, we heard day-hikers asking for directions at 8pm. They had seven miles back to the trailhead, and more to their car or campsite, all in full dark. The trail is tricky enough in the daylight; it’s an accident waiting to happen at night.
Be willing to adjust plans
If you’re too tired, turn back. If the hike is taking longer than planned, turn back. If clouds are gathering and storm is moving in, turn back. If it rained on the way up and the rock face is dangerously slick, turn back. If the cables terrify you, turn back.
Enjoy every moment of your hike. Acknowledge the accomplishment of reaching your turnaround point, wherever that is. If Half Dome still calls to you, vow to come back someday. It will still be there.
Happy hiking! Here are a few key resources, repeated from the text above:
- Half Dome day permits
- Half Dome wilderness permits
- Video of the Half Dome climbing experience (a must-see!)
- The Yosemite Wilderness Center
- Yosemite ranger: 209–372–0826
- Yosemite public information office: 209–372–0200
- More information and tips for hiking Half Dome
This article is one of many written about a 3-week road trip spent hiking and camping in the Eastern Sierras and Death Valley. To see all articles, check out this trip summary.
